Service Today is your go-to contractor for thermostat installation, repair, testing, and calibration in the Twin Cities region. Installing a thermostat is relatively easy compared to other heating & air conditioning projects. In fact, most people can do it without the help of a professional. If you’re looking to replace your old thermostat or convert to a programmable or Wi-Fi unit, these steps can help you achieve convenience and energy savings.
6 Simple Steps to Thermostat Installation
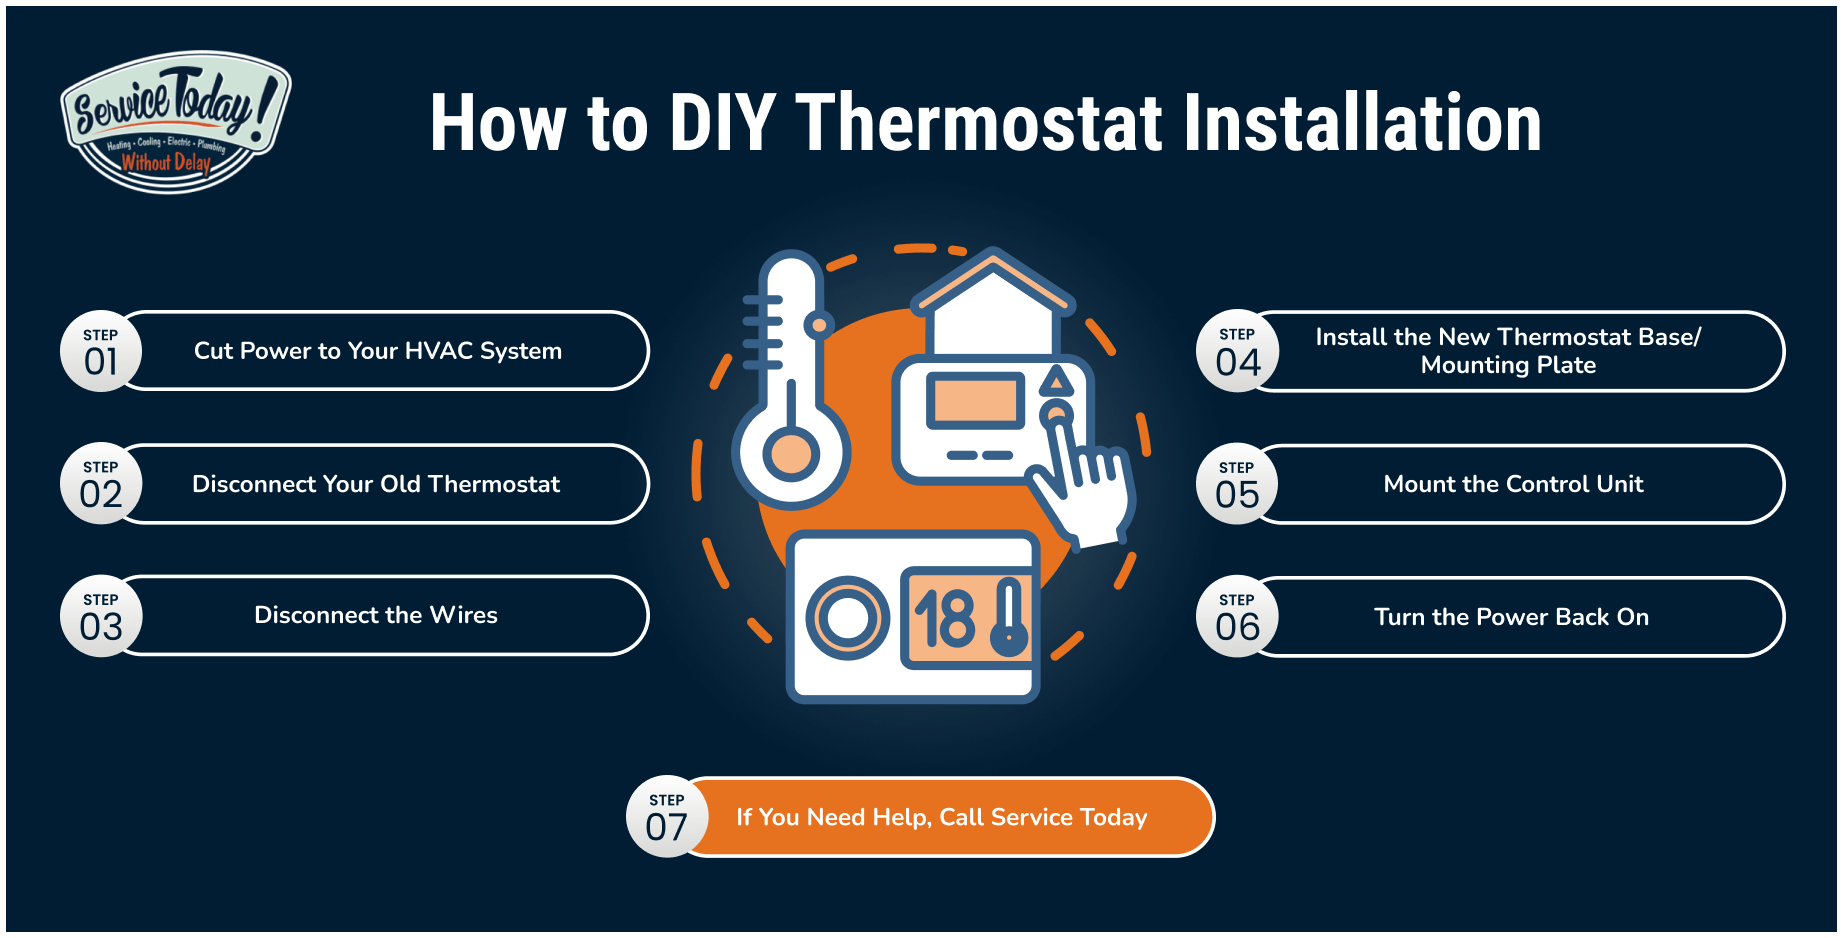
1. Cut Power to Your Heating & Air Conditioning System
To prevent damage and injury, turn off the circuit breaker that serves your heating & air conditioning system. The breaker should be labeled in the main electrical panel. Also note the rated voltage. The thermostat should match the specified voltage or else you risk damage to the controls, shocks, or a fire.
2. Disconnect Your Old Thermostat
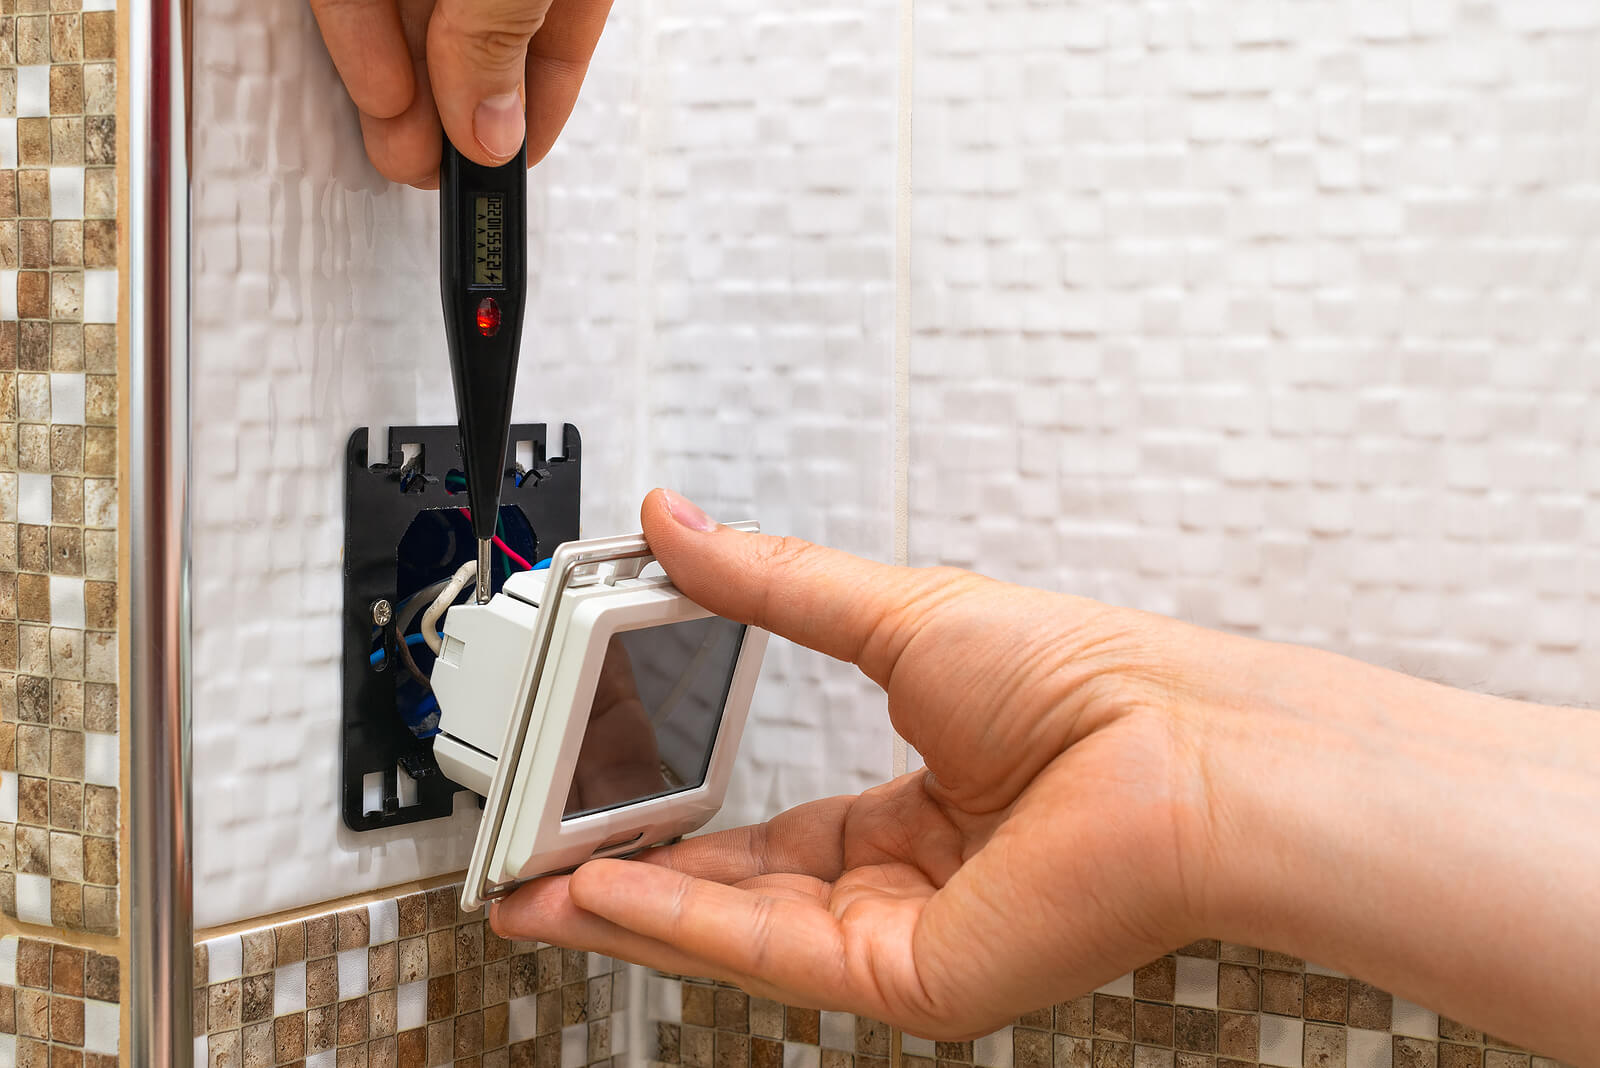
Use a screwdriver to remove the cover plate screws and take the cover off. Some covers simply pop off with a little pressure. Next, remove the screw securing the unit to the wall. Once the thermostat is separated from the wall, label the attached wires (there may be two to five of them). Stick a piece of masking tape to each wire and write a letter corresponding to the wire’s color. Use the old screw terminals as a reference.
3. Disconnect the Wires
The last thing you want is to lose the wires in the wall. To avoid this, tape them to the outside of the wall or wrap them around a pencil, mini screwdriver, or other object to keep them in place. You can now perform thermostat installation with much less hassle.
4. Install the New Thermostat Base/Mounting Plate
How you proceed next depends on the thermostat you had. If there are just two wires, the unit only runs on batteries. Either install a programmable unit that’s battery powered, or first install a C-wire to deliver electrical power to the new thermostat. You can install a C-wire or use a 24-volt adapter that plugs into a nearby outlet. Otherwise, a C-wire must be installed from scratch and run through the walls; it’s best to call an electrician for this.
Use the supplied wiring diagram, and your labels, as references to attach all the wires in the new thermostat.
Once you’ve removed the old thermostat base:
- Remove the base from the body of the new unit.
- Insert the low-voltage wires through the appropriate opening.
- Use a level to ensure the base is properly aligned.
- Mount the base to the wall using the included screws.
- Connect the low-voltage wires to their respective terminals.
- Make sure all wiring connections are tight.
*You may need to drill small holes and drywall anchors before you screw the plate onto the wall.
5. Mount the Control Unit
To attach the main thermostat unit to the base, snap it in or secure any screws if necessary. As you mount the device, gently push the wires back into the opening. Use fiberglass or other fire-resistant material for insulation to plug the hole; this will prevent drafts from affecting thermostat readings.
6.Turn the Power Back On
Restore power to the circuit at the breaker. Then press the thermostat’s reset button and follow the user manual for programming it. Test the unit to ensure it’s properly connected and your air conditioner and furnace are working.
7. If You Need Help, Call Service Today
Not everyone will find thermostat installation easy. We can help if you need one replaced or want to upgrade to a smart thermostat. Our experienced technicians know how to handle wiring, placement, and testing; they’re also knowledgeable and ready for any issue that may arise. To learn more or request service, call .